A Comprehensive Guide to LiftMaster Garage Door O…
April 14, 2018

Garage door openers have become an integral part of modern convenience, allowing us to effortlessly access our garages with the click of a button. The remote controls, a key component of these systems, rely on batteries to function effectively.
Changing the battery in your garage door opener remote is a straightforward process. Begin by identifying the battery type, typically a coin cell like CR2032. Use a small screwdriver to open the battery compartment, remove the old battery, and replace it with a new one, ensuring proper polarity. Close the compartment securely, and test the remote to ensure smooth and reliable operation.
In this comprehensive guide, we will explore the step-by-step process of changing the battery in a garage door opener remote. Additionally, we'll delve into specific instructions for changing the battery in a Chamberlain garage door opener keypad, shedding light on the nuances of this popular brand.
Before we embark on the practical steps, it's crucial to understand why changing the battery is essential. A well-functioning battery ensures reliable communication between the remote control and the garage door opener. Over time, batteries lose their charge, leading to decreased performance and the risk of the remote failing at an inconvenient moment. Regularly changing the battery is a preventive measure that ensures your garage door opener operates smoothly.
Begin by identifying the type of battery your garage door opener remote uses. Commonly, these remotes are powered by coin cell batteries, such as CR2032. Refer to your device's manual or inspect the battery compartment for specific information.
Prepare the tools you'll need, typically a small screwdriver to open the remote's battery compartment. Ensure you have a replacement battery of the correct type on hand.
Using the screwdriver, carefully open the battery compartment on the back of the remote. Take note of the existing battery's position and orientation to ensure proper placement of the new battery.
Gently remove the old battery from its compartment. Exercise caution to avoid damaging the remote or the battery housing. Dispose of the old battery following proper recycling guidelines.
Place the new battery into the compartment, ensuring it aligns with the correct polarity. Follow the markings inside the compartment to correctly position the positive (+) and negative (-) ends of the battery.
Carefully close the battery compartment, securing it with the screwdriver if necessary. Ensure the compartment is tightly sealed to prevent any issues with the remote's functionality.
Test the remote by pressing the buttons to ensure the new battery has been installed correctly. If the remote responds as expected, the battery replacement process is successful.
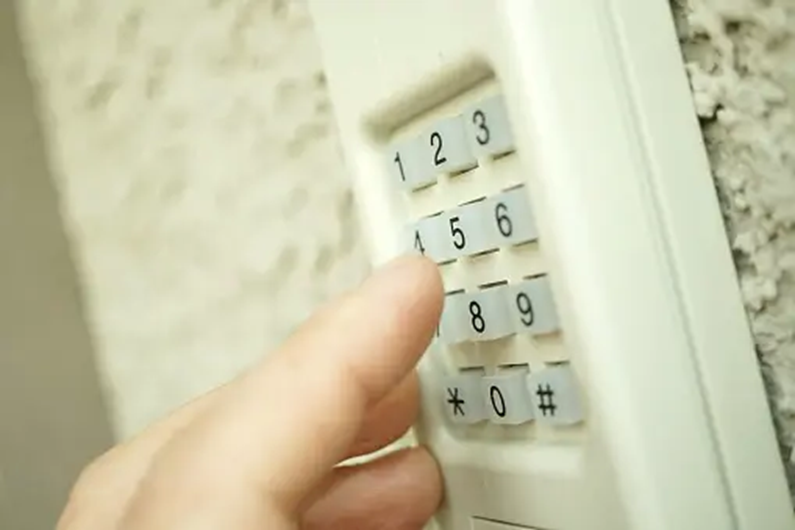
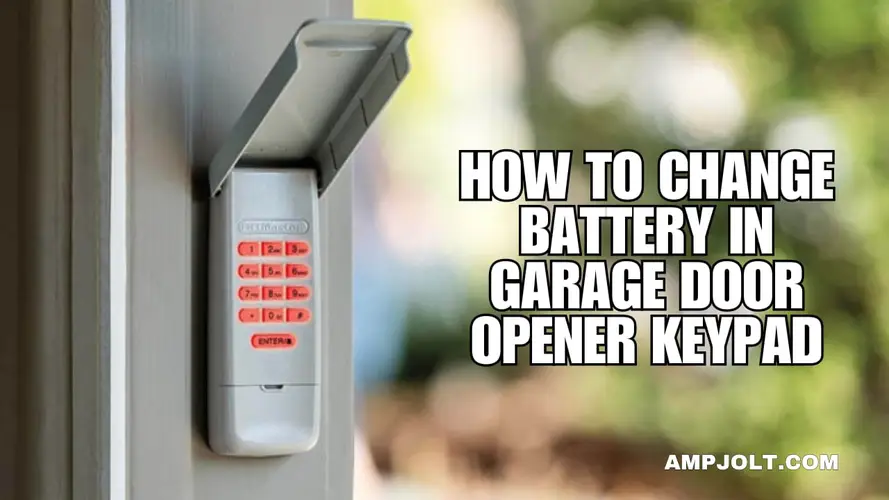
Chamberlain garage door openers often come equipped with keypads for secure access. Changing the battery in the keypad involves a slightly different process.

Chamberlain keypads typically use a 9-volt alkaline battery. Verify the battery type and gather a replacement battery.
Find the battery compartment on the keypad. It is usually located behind the keypad cover, which can be opened by pressing a release button or using a screwdriver to open the cover.
Take out the old battery, ensuring you note the correct orientation. Dispose of the old battery responsibly.
Place the new 9-volt battery into the compartment, aligning the positive and negative terminals correctly. Follow any markings inside the compartment for guidance.
Securely close the battery compartment, making sure it is tightly sealed. This is crucial for protecting the battery from the elements and ensuring the longevity of the keypad's functionality.
Test the keypad by entering the access code and confirming that the garage door responds appropriately. A functioning keypad indicates a successful battery replacement.
Regular Checks: Periodically check the battery status in your remote or keypad, even if it's not showing signs of failure. This proactive approach helps avoid unexpected issues.
Quality Batteries: Opt for high-quality batteries from reputable brands to ensure longevity and reliability. Cheap or expired batteries may lead to premature failures.
Clean Contacts: If your remote or keypad is not responding well, inspect and clean the battery contacts. Use a small, dry brush or cotton swab to remove any dust or residue.
Reset the Keypad: If changing the battery in a Chamberlain keypad doesn't resolve issues, consult the user manual for instructions on resetting the keypad and reprogramming the access code.
Changing the battery in your garage door opener keypad is a routine maintenance task, but occasionally, issues may persist even after battery replacement. If your garage door opener keypad is still not working correctly, follow these troubleshooting steps to identify and resolve the problem.
Ensure that the new battery is correctly installed with the correct polarity. Double-check that the positive (+) and negative (-) terminals align with the markings inside the battery compartment. Even a slight misalignment can affect functionality.
Over time, battery contacts may accumulate dust or corrosion, disrupting the electrical connection. Use a small, dry brush or a cotton swab to gently clean the battery contacts. Ensure the contacts are free of any debris that might impede the flow of electricity.
Confirm that the keypad is correctly programmed with the access code. If the programming was affected during the battery replacement, re-enter the access code following the manufacturer's instructions. Refer to the user manual for guidance on reprogramming.
Some keypads have a reset function to restore factory settings. Check the user manual for instructions on how to reset the keypad. This process often involves pressing specific buttons in a sequence or using a reset button on the device.
While rare, it's possible to encounter defective or low-quality batteries. If issues persist, try replacing the new battery with another one, preferably from a different batch or brand. Ensure it is a fresh battery with a full charge.
Examine the keypad for any signs of physical damage, such as cracks, moisture, or exposed wiring. Physical damage can compromise the keypad's functionality. If damage is evident, consider replacing the keypad.
Some keypads might be sensitive to lighting conditions, especially if they use backlighting. Test the keypad in different lighting conditions to ensure that the buttons are visible and responsive.
If troubleshooting steps do not resolve the issue, contact the manufacturer's customer support for assistance. They can provide specific guidance based on the model of your keypad and may offer additional troubleshooting steps or recommend professional service.
Check if there are any available firmware or software updates for your keypad. Manufacturers occasionally release updates to address bugs or improve performance. Follow the provided instructions for updating the keypad's firmware.
If all else fails, and the keypad continues to malfunction, it may be time to seek professional assistance. A certified technician or the manufacturer's service team can assess the keypad and identify any underlying issues that require attention.
By following these troubleshooting steps, you can systematically address potential issues with your garage door opener keypad. Remember to refer to the user manual for specific instructions related to your keypad model and, if necessary, seek assistance from the manufacturer's support or a qualified technician.
Changing the battery in your garage door opener remote or keypad is a straightforward process that contributes to the overall efficiency and reliability of your garage door system. Regular maintenance, choosing quality batteries, and following manufacturer guidelines are key practices to ensure smooth operation. By understanding the simple steps outlined in this guide, you empower yourself to take charge of the maintenance of your garage door opener, enhancing the convenience and security it provides to your home.
It is advisable to change the battery in your garage door opener remote at least once a year, even if it appears to be functioning well. Regular replacement ensures optimal performance and prevents unexpected failures.
Most garage door opener remotes use coin cell batteries, commonly CR2032. However, it's essential to check the user manual or inspect the battery compartment for specific information about your remote.
It is generally not recommended to use rechargeable batteries in garage door opener remotes. Standard alkaline or lithium batteries are more suitable for consistent and reliable performance.
Chamberlain garage door opener keypads typically use a 9-volt alkaline battery. It's crucial to verify the battery type and follow the manufacturer's recommendations for optimal performance.
While various brands of batteries are available, it is advisable to choose reputable and high-quality brands to ensure longevity and reliable performance. Cheap or expired batteries may lead to premature failures.
Yes, it is essential to recycle old batteries responsibly. Many local recycling centers accept household batteries. Check with your local waste management or recycling facility for guidelines on battery disposal.
April 14, 2018
April 14, 2018
April 14, 2018

April 14, 2018

April 14, 2018

April 14, 2018
April 14, 2018
April 14, 2018
April 14, 2018
April 14, 2018
April 14, 2018
April 14, 2018

April 14, 2018
April 14, 2018

April 14, 2018
April 14, 2018

April 14, 2018

April 14, 2018

April 14, 2018
April 14, 2018
April 14, 2018
April 14, 2018
April 14, 2018

April 14, 2018

April 14, 2018

April 14, 2018

April 14, 2018

April 14, 2018

April 14, 2018

April 14, 2018

April 14, 2018

April 14, 2018
April 14, 2018

April 14, 2018
Comments
Write a comment